20/11/2013

Bambi Eyes


Lately I get more and more questions like;
"What kind of mascara are you using? Or are those eyelashes from youreself?"

This is my secret...
I'm not using mascara on the top lashes and they are partly fake.

“Oh realy? But I cant find any place where they are sticked on. How is this possible? It looks so natural.”

It looks fantastic!

The way of placing these lash extensions makes it look like the lashes are natural.
Individual extensions are placed on each lash seperately. Every single lash gets a new thicker black hair attached to it. This is done with a special bonder.

When I was younger I was very shy and insecure about the way I looked. Since I'm a natural blond my lashes are also blond. I started painting my lashes darker, but that wasn't enough. Before I knew it make-up became an obsession, I was busy applying mascara and other make-up for at least 1 hour every morning. Lucky for me this time is in the past! 
I can't show you any pictures from before, because I have these lashes for more than a year already.
With these lashes I'm very happy when I look in the mirror each morning. It feels so free! The only thing I do put on is a little eye-liner and some lipstick and after a minute I'm ready to go!


Today I went to studio Highlights for a refill...


This is how the extensions are placed

1. The first step is to place tape to protect the lower lashes.
Then you have to close your eyes and keep them closed until it's finished.


2. Placing the extensions by spreading out your own lashes with a pincet to place the individual extensions one by one to a lash with a special bonder.


3. Sealing the extensions.


4. Blowing them dry with a bladder pump.


5. The tape will be removed and you're ready to open your eyes to see the stunning result!


The first time I went for a new set it took 1,5 hours. This refill session took about 30 minutes.

Tip: Use oil free eyemak-up, facecare products and makeup removers, because oil will weaken the lash bonder.

Tip: Make sure your eyes are totally clean and free of make-up and oils before you get your lash extensions. When you come with make-up on they wil clean your eyes for you, but the extensions will last longer when you did it before.

Another question I often get is if my own lashes don't fall out. I still have as much as before I started wearing the extensions.

In the beginning I had to learn when I needed to go for a refill and how to take care of the extensions and not to rub my eyes. It was very frustrating when I did, because I had emty spots. When you do take good care you will only lose the extensions when your own lashes fall out due to natural growing process.

For some people it looks quite painful, because of the tape they place under the eyes for protecting your own bottom lashes. I can assure you it's not painfull at all.
When you keep your eyes closed as long as they say you have to you don't feel anything of placing the lashes.

It does cost more than mascara, though when your lashes are refilled only once every two weeks it's payable.
To me it's so worth it! Just look at the result, don't you agree?


This is the salon I went to:
pictures by: Jelmer steenhuis

Studio Highlights
Werumeus Buningstraat 26/1
Groningen.
Tel. 050-8513288

05/10/2013

Silver Outlined


This fall I rediscovered white, with golden or bordeaux accents.
This nail polish is fitting right in that picture! I fell in love with this beautiful deep bordeaux red colour from Pink Gellac. I can look all day at the high shiny polish my fingernails now have. I can't get enough of it.

I had to get used to the way the colour works. Its quite different from applying the french manicure from this brand. When I applied the first layer, the colour was shrinking a bit, don't worry though. When applying it very carefully, it will be fine when you apply the next layer. I like simplicity, that's why I chose to do a simple nail art by just combining colours that I like in a very simple way.

After using the colour I discovered that the coloured nail polish will last longer than the french manicure. A tip for lasting longer with the Gellac, is to use rubber handgloves when you are cleaning or doing the dishes, to make sure the polish won't be damaged. 

I don't think it's neccesary to tell you how I did my nails. I wrote an article about how to use Pink Gellac before so you can look that up if you're interested. 
This artwork is very simple to do and my pictures will tell you how.

Look and enjoy!


Things you need:


How to:


The result:


pictures by: Jelmer Steenhuis

Silver polish: Pink Gellac Collor 129 Faboulous Silver
Red polish: Pink Gellac Collor 111 Rustic Red  

You can buy the beautiful colors of nail polish and more high quality nail products from Pink Gellac here: www.pinkgellac.nl

04/10/2013

Neoprenic


pictures by: Jelmer Steenhuis

Despite the fact that I like to wear many styles, I catch myself choosing more often simpler clothes or wear one color.
I always was obsessed by textures and the feminine lines in clothes. Luckely different textures are in fashion and there are a lot of surprising combinations or ways of using materials at the moment. I really like the feel of the material of this neopreen sweater and skirt. Normally you wil find a variation of neopreen in, by example, a diving suit.
Zara, made from a thin kind of neopreen a chic a line skirt and sweater.
Neopreen has it's own way of staying in form and how it drapes around you. This gives the sweater and skirt a special touch.

Sweater: Zara
Skirt: Zara
Overknee suede boots: Vintage
Leather bag: Georges Rech


28/09/2013

Well Hello Goodmorning!


pictures by: Jelmer Steenhuis


Today is my birthday! Now I am 24 years of age!
Because I celebrate my birthday on another day, I could sleep late and walk around in my morning coat half of the day. So I won't show you an birthday outfit, instead I post this beautiful negligee.
I bought it in a vintage shop. It reminds me of the 50's. The flower pattern gives me that flimsy housewife feeling, which I think is very sexy. Another good thing to point out is that beautiful clothes don't always have to cost a lot of money. This gown costs me 4,- euros. Well, isn't that nice!

If you keep your eyes open you will find the most beautiful things. When you use your imagination you will see things in clothes that others won't. You can style it the way you like and get your own unique look that suits you. Sometimes this can be done by remodeling, adding the right pieces to the picture or simply because you are you and certain clothes or accesories just look great with your natural style. 

16/09/2013

About My Nails


I prefer a natural look, but it has to look like you've been taking care of them and they have to look healthy and clean. The look aside, I don't want to spend time on it often.

I started with fake nails and have been trying the gell variant and the acrylic nails. After a year I concluded these were no options for me. I have been in different salons. I have been trying different collors and I even tried just a transparent gel layer on my own nails. That doesn't work for me either. I think it has a very thick, fake look and a fake color. Next to that, it is very expensive and it never stayed on my nails. I had to let it be repaired every week. It cost me too much money and too much frustration, plus I had strong nails myself which I was destroying by having fake nails.
I switched over to normal nailpolish which wasn't satisfying either because it was always cracking after one day (even if I bought it from a very expensive brand). But at least I didn't have to go back to the salon every week.

Lately I discovered Pink Gellac from the Pink Beauty Club.
This is my experience with Gellac.

Gellac will last longer than a normal nail polish. It dries immediatly and you don't need to do you're nails over and over.

In the beginning it was hopeless to me because it didn't stay on after the first day.
I thought that it was another disappointment.
When I contacted the costumer service they were very helpful, they told me they had a new nail cleaner and that they'll send it one to me.

After using the new cleaner:
Now it stays on for about one and a half weeks with beautiful results!

I have been trying this polish for a few months now and I'm very happy with the look of my nails.
It has a very high gloss effect and a very natural color witch makes me appriciate it more.

This nailpolish is just as easy as putting on french manicure with a normal nail polish and has as a big plus that it is dry emidietly.
It keeps you're own nails stronger and they won't split while wearing Gellac. So if you want, you can let you're nails grow.

The Gellac polish is a lot more expensive than normal nail polish. After weighing the pro's and cons it is worth it to me!

I will show you how to do a beautiful French manicure.
This is what I wear the most. It looks natural and fits in almost every picture, in stead of a bright color wich you have to combine with the cloth you wear.


This is all you need:

1: A ultra-violet lamp special for nail drying.
Tip: you don't need to buy the expensive one that belongs to the polish. Buy it second hand or from a wholesale business. Let yourself be informed about the quality or do research so you know you are buying the best.
2: A piece of paper (For a clean workspot)
3: Stopwatch (I'm using the stopwatch on my phone)
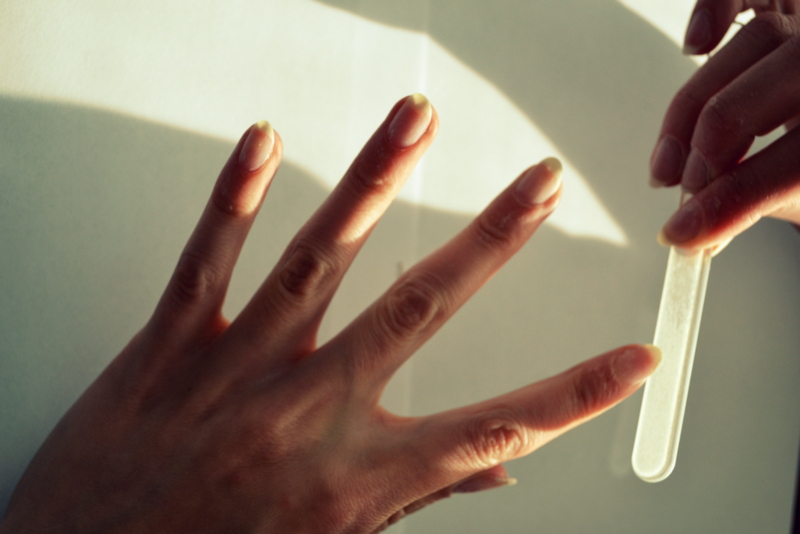
4: Nailfile (The one I'm using is from Herome)
5: Cuticle Pucher
6: Nailcleaner (They sell a remover as well, but I have never needed that one because the whole Gellac is going off on it self after one and a half week without cracking or losing small pieces)
7: Cotton pads (They sell special nail wipe's I have tried them too, but I think the result is the same when you use just regular cotton pads)
8: A small pencil (They sell a small pencil specially made for nail art. I have tried this one but they are very expensive and in my opinion a cheap small pencil from a paint art store works as well)
9: Pink Gellac Base
10: Pink Gellac color 101 (I have tried it in combination with the soft pink color 121, but I think this one gets very yellowish after a while. Now I do my nails without it and I think it looks more natural.)
11: Pink Gellac Shine (Top coat)


1

2

3

4


6


7

8


9

10


11

12


This are the steps:
1: Push you're cuticles back.
2: File you're nails on the nail surface. (make sure you do that on every spot ant don't forget the beginning and the tip of youre nails)
3: File you're nails in the form you want. (I chose for a very natural soft round form)
4: Clean them with the nailcleaner (make sure you don't forget any spot)
5: Stir the pollish before using, for a while (do not shake otherwise you will see bubbles in the result)
6: Bring the base on you're nails just as you would with a normal nail pollish.
7: Let the gellac base dry for 30 seconds under the uv-light.
8: Bring the color 101 on just the tip of you're nails with a small pencil.
9: Let the gellac dry for 2 minutes under the uv-light
10: Bring on the top coat just as you would with a normal nail pollish.
11: See step 9
12: Clean you're nails again with the nailcleaner (so you remove the sticky layer the gellack is leaving on youre nails)


Pictures by: Jelmer Steenhuis
Look at the result! Don't you think it is beautiful!


Tip:
  • Make sure you work on a clean underground otherwise you wil get dust or other things in the pollish which you will see in the result. I always clean the tabel and use paper as a undergroud
    before starting.
  • In the beginning, I was washing my hands before starting. When I stopped doing that, Gellac stayed better on my nails. This is because the nails are getting moist. So make sure you're nails are dry!

  • Stop using normal nail polish because that makes you're nails more brose. This causes Gellac to not stay very well.

  • Smooth out the polishbrush thoroughly because you only need a bit gellac for a thin layer. If you want more strength you can bring on more layers.

  • Make sure that you leave over 1 milimeter from you're nails to you're skin. When you don't, you will get a bumper at the beginning of you're nails. This will cause the gellac to wear off more easily.
  • Make sure you polish the end of the tip very well, but don't use to much gellac on the tip because that will create other bumpers which makes that the gellac will go off.

  • If you are not very good in doing the tip, dont give up, after practicing it a few times you will see you're result will get better.

  • After putting on the gellac you can use some handcream for the finishing touch. You're skin will dry out from the nailcleaner as you can see.

You can buy the beautiful colors of nail polish and more high quality nail products from Pink Gellac here: www.pinkgellac.nl